Create articles from any YouTube video or use our API to get YouTube transcriptions
Start for freeIntroduction
The Sony A6400 is a powerful camera capable of producing stunning video footage when configured correctly. This guide will walk you through the optimal settings for professional video production, applicable to most of the Sony Alpha camera line. We'll cover everything from basic video settings to advanced customizations that will help you get the most out of your camera.
Basic Video Settings
File Format and Frame Rate
To begin, navigate to the video tab at the top of your camera's menu. Under the first tab, you'll find these crucial settings:
- File Format: Set this to 4K for the highest possible image quality.
- Record Settings: Choose 24 frames per second (fps) at 100 megabits per second.
24 fps is the industry standard and provides the most natural-looking motion. The high bitrate of 100 Mbps ensures you're capturing the maximum amount of data, which is beneficial for color grading in post-production.
S&Q Settings
Scroll down to find the S&Q (Slow and Quick) settings. Configure these as follows:
- Set to 24 fps at 120 fps
This setting allows for internal slow-motion recording. The camera will record at 120 fps but output a 24 fps video, resulting in smooth slow-motion footage without requiring post-processing.
Pro Tip: If you prefer to create slow-motion effects in post-production, you can set the file format to 1080p and choose 120 fps in the record settings. This method allows you to record audio and gives you more control over the slow-motion effect in editing.
Autofocus Settings
Proper autofocus configuration is crucial for professional-looking video. Here are the recommended settings:
- AF Drive Speed: Set to Normal
- AF Track Sens: Set to Responsive
These settings strike a balance between speed and accuracy. The normal drive speed prevents the focus from being too jumpy or too sluggish, while the responsive tracking sensitivity ensures quick subject acquisition.
Audio Settings
Good audio is just as important as good video. Enable the Audio Level Display to monitor your audio levels directly on the camera's screen. This feature helps prevent audio clipping and ensures your recordings have clean, properly leveled sound.
Custom Button Configuration
Customizing your camera's buttons can significantly improve your workflow. Here are some recommended configurations:
Movie Button Reassignment
Enable the Movie with Shutter option. This remaps the record button to the shutter button, making it easier to start and stop recording.
Zoom Settings
Activate Clear Image Zoom. This feature allows you to zoom in 1.5x without losing image quality, which can be particularly useful when using prime lenses.
Custom Keys
- C1 Button: Set to AF/MF Toggle
- Down on Control Wheel: Set to Zoom
- Trash Button: Set to Zebra Display
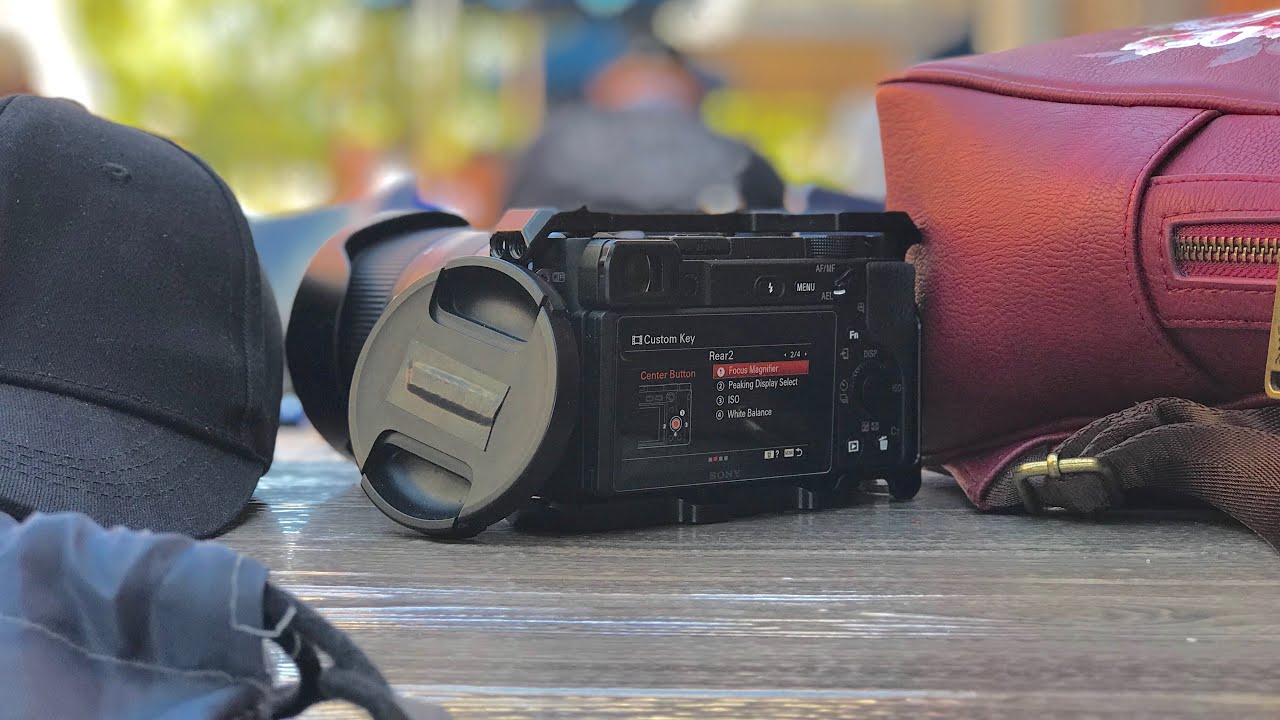
Control Wheel Customization
- Center Button: Focus Magnifier
- Down Button: Peaking Display
- Right Button: ISO
- Left Button: White Balance
These custom settings provide quick access to essential functions, allowing you to adjust your camera on the fly without diving into menus.
Display Settings
Viewfinder/Monitor Selection
Set Finder/Monitor to "Monitor Only". This keeps your rear screen active at all times, which is generally more convenient for video shooting.
Monitor Brightness
Set Monitor Brightness to "Sunny". This ensures your screen remains visible even in bright outdoor conditions.
Power Management
To maximize battery life, enable Airplane Mode. This disables Wi-Fi, slightly extending your shooting time.
Enable USB Power Supply to allow the use of external power banks, greatly extending your camera's operational time.
Important: When connecting an external power supply, always turn off the camera first. After connecting, turn on the camera and look for a charging icon to confirm the power supply is recognized.
Advanced Features
Gamma Display Assist
Assign the Gamma Display Assist function to a custom button (like C1). This feature helps you judge exposure more accurately when using flat picture profiles, without affecting the recorded footage.
Focus Assistance Tools
Utilize Focus Magnifier and Peaking Display to ensure sharp focus, especially when manually focusing. The peaking display highlights in-focus areas, making it easier to judge critical focus.
Function Menu Customization
Customize your Function Menu for quick access to frequently used settings. Some recommended inclusions are:
- Focus Area
- Audio Record Level
These allow you to quickly adjust focus points and audio input levels without entering the main menu.
Conclusion
Optimizing your Sony A6400 for video production involves a combination of settings that balance image quality, usability, and power management. By following this guide, you'll be well on your way to capturing professional-quality video with your camera.
Remember, these settings serve as a starting point. As you become more familiar with your camera, you may find that certain adjustments better suit your specific shooting style or requirements. Don't be afraid to experiment and fine-tune these settings to match your needs.
With your Sony A6400 now optimized for video, you're ready to start creating stunning footage. Happy shooting!
Additional Resources
To further enhance your videography skills with the Sony A6400, consider exploring these topics:
-
Picture Profiles: Learn about Sony's various picture profiles and how they can give you more flexibility in post-production.
-
External Monitors: Discover how using an external monitor can improve your framing and focus accuracy.
-
Lens Selection: Explore different lenses and how they can affect your video's look and feel.
-
Stabilization Techniques: Study various methods to stabilize your footage, from in-body stabilization to external gimbals.
-
Color Grading: Learn the basics of color grading to enhance the visual appeal of your footage in post-production.
-
Audio Recording: Dive deeper into audio recording techniques, including the use of external microphones and audio recorders.
-
Lighting Techniques: Understand how proper lighting can dramatically improve the quality of your video.
-
Composition Rules: Study classic composition techniques to make your shots more visually appealing.
-
Storytelling Through Video: Learn how to use your technical skills to tell compelling stories through video.
-
Post-Production Workflow: Develop an efficient post-production workflow to streamline your editing process.
By continually learning and refining your skills in these areas, you'll be able to take full advantage of your Sony A6400's capabilities and produce increasingly professional video content.
Troubleshooting Common Issues
Even with optimal settings, you may encounter some challenges. Here are solutions to common problems:
-
Overheating: The A6400 can sometimes overheat during long recording sessions. To mitigate this:
- Use an external power source instead of the internal battery
- Avoid direct sunlight on the camera body
- Use the flip-out screen instead of the viewfinder when possible
-
Rolling Shutter: This can occur when panning quickly. To minimize:
- Use faster shutter speeds
- Avoid rapid pans
- Consider using Clear Image Zoom instead of physical panning for some shots
-
Low Light Performance: If you're struggling in low light:
- Use fast lenses (low f-number)
- Increase ISO, but be mindful of noise
- Consider using additional lighting
-
Autofocus Issues: If autofocus is not performing as expected:
- Ensure you're using the appropriate focus area for your scene
- In challenging conditions, consider using manual focus with focus peaking
- For moving subjects, use tracking autofocus
-
Audio Quality: To improve audio:
- Use an external microphone whenever possible
- Monitor audio levels using the on-screen display
- Consider recording audio separately with a dedicated audio recorder for critical work
Remember, practice and experimentation are key to mastering your Sony A6400. Don't be afraid to test different settings and techniques to find what works best for your specific needs and shooting style.
Maintaining Your Camera
To ensure your Sony A6400 continues to perform at its best, consider these maintenance tips:
-
Regular Cleaning: Use a blower and soft brush to remove dust from the sensor and lens. For stubborn spots, consider professional sensor cleaning.
-
Firmware Updates: Regularly check for and install firmware updates from Sony. These can improve performance and add new features.
-
Battery Care: Properly maintain your batteries by not letting them fully discharge and storing them in a cool, dry place when not in use.
-
Lens Care: Keep your lenses clean and store them with both front and rear caps on. Use a UV filter to protect the front element of your lenses.
-
Storage: When not in use, store your camera in a dry place with a silica gel packet to prevent moisture buildup.
-
Regular Check-ups: Periodically check all buttons and dials to ensure they're functioning correctly. If you notice any issues, have them addressed promptly.
By taking good care of your Sony A6400, you'll ensure it remains a reliable tool for your video production needs for years to come.
With these settings, troubleshooting tips, and maintenance advice, you're now fully equipped to make the most of your Sony A6400 for video production. Remember, the best way to improve is through practice, so get out there and start shooting!
Article created from: https://www.youtube.com/watch?v=WvWMt-a5vP4